
Ingredients
- 3 cups salted peanuts loosely chopped
- 2 cups mini marshmallows
- 2 cups mini peanut butter chips
- 1 cup sweetened condensed milk
- 3 tbsp unsalted butter
- 3 cups dark melting chocolate
- parchment paper or wax paper
Instructions
- In a medium pot, add the peanut butter chips, marshmallows, sweetened condensed milk, and butter.
- Over medium-low heat, melt the ingredients. Stir continuously to avoid burning the bottom. Remove from heat as soon as the nougat mixture is smooth. Do not boil.
- Loosely chop the peanuts and divide into two portions.
- On a large piece of parchment paper or wax paper, shape one portion of peanuts into a tight one-layer rectangle about 9 inches x 11 inches in size.
- Pour the nougat over top of the peanuts. Use the back of the spoon to spread it evenly across the peanuts.
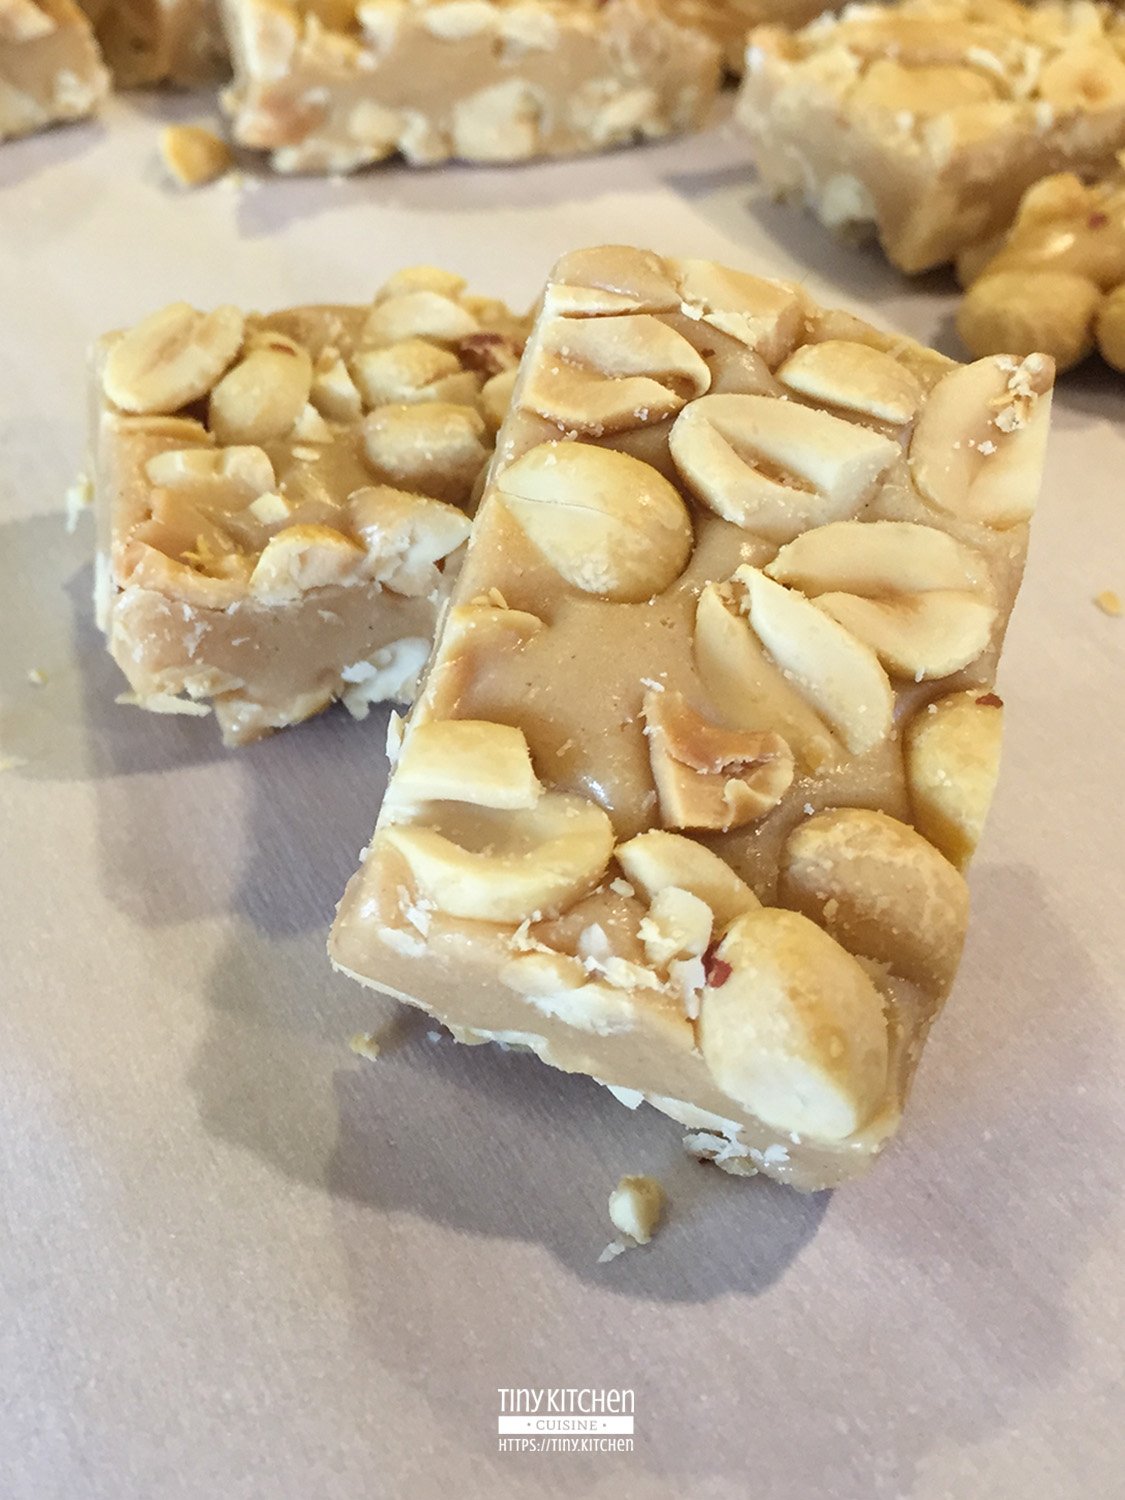
- Cover the top of the nougat with the remaining peanuts. Gently pat them down to ensure that there are no loose nuts or exposed nougat.
- Refrigerate for 6 hours or overnight.
- With a large sharp knife, cut the candy into 24 pieces.
- Melt your chocolate in a small saucepan.
- Take each candy bar and dip into the melted chocolate, covering it completely. Drip off any excess chocolate and set the candy aside on another piece of parchment or wax paper to cool.
- Refrigerate for another 2 hours until the chocolate has set.
- Store in an airtight container.
Notes
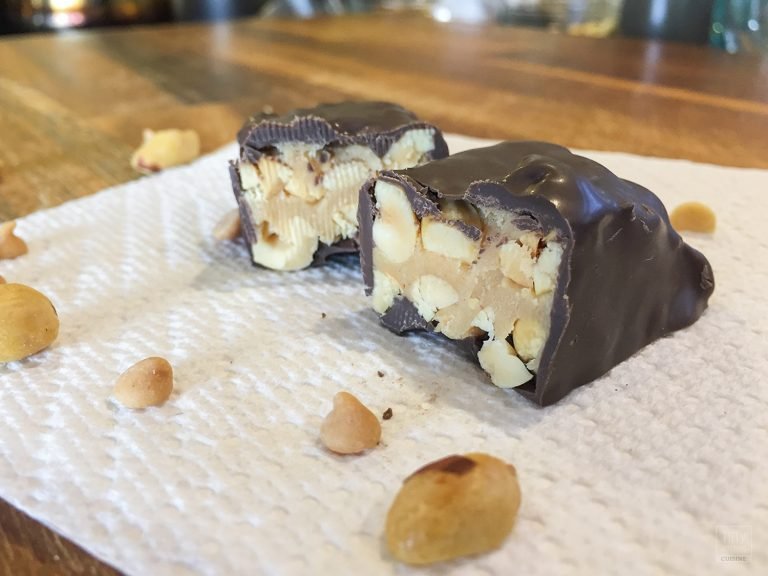
Crunchy peanuts covering a chewy peanut-flavored nougat and coated in chocolate… what’s not to love about this candy bar?! Long sought-after, the Chocolate Covered PayDay® bar was discontinued in the 1980s but has remained in the hearts of candy lovers of decades. Stop searching! Satisfy that sweet tooth and make some at home with this delicious recipe!
Disclaimer: The PayDay® candy bar is registered to The Hershey Company. Tiny Kitchen Cuisine and this recipe are in no way connected with The Hershey Company. This recipe recreates flavors similar to the popular candy bar, but is not intended to replace or infringe upon their proprietary recipe.
I Didn’t Know Chocolate Covered PayDay® Bars Existed!
Some time ago, I were sitting around with a friend and talking about candy. (You know, like all normal high-functioning adults do from time to time…) She mentioned that one of her favorite candy bars was a chocolate covered PayDay®; but she wasn’t able to find them anymore. I always jump to challenge when I hear something like that. So I started doing some research on the topic.
Well, it turns out that the chocolate covered PayDay® bar was released in the 1980s, but had been discontinued. The Hershey Company came back in 2007 with a line of PayDay® Avalanche bars—which included a chocolate version. That, too, was discontinued.
But the idea was so simple! It was basically taking their existing candy bar and covering it in milk chocolate. Easy right? My friend’s birthday was coming up so, I decided to make some at home for her instead. They turned out to be absolutely amazing!
Isn’t a Chocolate Covered PayDay® Just a Baby Ruth®?
A Baby Ruth® candy bar made by Nestlé is made of peanuts, caramel, and chocolate-flavored nougat covered in milk chocolate. A Chocolate Covered PayDay® bar is made of peanuts, caramel, and peanut-flavored nougat which is then covered in chocolate. It sounds similar right? Well it’s not. In the PayDay® bar, the peanuts are left mostly whole and the ratio of nut-to-nougat is much greater. The biggest difference between the two is the crunch factor.
The Copycat PayDay® Bar…
Recipes exist all over the internet and I take no credit for the copycat version. I’ve listed a few different sites below that I used when coming up with this recipe. I think all of them deserve the link love and they’re independently great resources for other recipes as well so give them a look when you have time.
- Spend With Pennies: Copy Cat PayDay Candy Bars
- Lil’ Luna: Homemade Pay Day Candy Bars
- Lady Behind The Curtain: Homemade PayDay Candy Bars
- Cookies and Cups: Homemade PayDay Bars
- Genius Kitchen Community Recipe: PayDay Bars
Run a search for it and you’ll see that the list of copycat recipes continues for days. As you can see from each of the sites, the ingredients, procedure, and amounts are all basically the same. You can reference and chocolate cover any one of the recipes from the fantastic sites that I mentioned. You could even just go out and buy a whole bunch of PayDay® bars and use those to cover in chocolate.

What makes this PayDay® Bar recipe different?
A few tiny things… I personally prefer to use mini peanut butter chips, less sweetened condensed milk, and completely skip the part about putting it in a baking dish.
I like working with mini peanut butter chips over the larger ones. In general, I think they melt better but more importantly, when you measure the chips out, the miniature size gives you a denser portion. That gives you more peanut butter flavor in the nougat—which I think is nice.
The second change I made was not using the entire can of sweetened condensed milk. I only use 1 cup. This leave you about a tablespoon or so leftover. (The extra goes great in coffee, by the way!) Why? As I was recreating some of the above recipes, I noticed that the candybars came out soft even after refrigeration. When it transformed into a chocolate covered PayDay® bar, the softness caused the chocolate coating to shatter and fall away when you bit into it. By reducing the amount of the milk, you firm up the nougat and that results in the stronger candybar.
Finally, I opted to not use a baking dish at all. No matter how much I greased the dish, I still had the absolute worst time of getting the bars out. Plus, I was greasing a dish which was not only annoying to clean but it also made my candybars greasy too. So instead, I lay a large sheet or parchment paper or wax paper over a cutting board and make the PayDay® bars right on top of that. The cutting board makes it so I can transport it easily and the paper prevents it from sticking without adding extra fat.

Making Chocolate Covered PayDay® Bars In A Tiny Kitchen
This recipe is a delicious, but when it comes to a tiny kitchen, you’re looking at a few challenges. The first will be your refrigerator. Because the PayDay® bars needs to chill in the fridge to get firm, you’re going to want to clear out a bit of space before you get started. Having a wide flat surface ready before you get started will make your life a lot easier. The good news is that by omitting the baking pan, you can literally shape the peanut loaf into any shape that fits your fridge!
Dishes will include a medium pot, a large sturdy spoon, a small pot, knife, and cutting board. Hot water is critical! Between the nougat and melted chocolate, you’re need the power of heat to clean up all that stickiness.
It’s sooo worth it though! By the time you’re done making these Chocolate Covered PayDay® bars, you’ll have 2 dozen delicious, crunchy, chocolatey, and peanut-buttery candy bars to snack on for days to come. They store well on the counter or in the fridge (my preference) and are really hard to resist. So there you have it! The long-sought-after (and so simple to make) Chocolate Covered PayDay® bar!
Have you tried this recipe? Let me know how you liked it by leaving me a comment below.


One response to “Chocolate Covered PayDay® Bar”
Adding a rating on 2019.11.19 at 11:03pm